Skip to content
BonusPink / Docs

Login and Regsitration

4
  • 🧑‍💻How to Register on Bonus Pink?
  • 📱How to Login with Phone?
  • 📧How to Login with Email?
  • 🔁How to Recover your Account Password?

Cards Creation

8
  • ✴️Stamp
  • 🎟️Multipass
  • 🎁 Gift
  • 💰Cashback
  • 🎫Coupon
  • ❤️Membership
  • 💲Discount
  • 🎁Reward

How to Install the Card

5
  • 🍏iPhone (iOS)
  • 🤖Android
  • PWA Cards on Android
  • Google Pay on Android
  • 🔁How to Restore the Card

Customers (CRM)

4
  • 👨Customer Profile
  • 🔃Import / Export
  • 🗃️Customer Filters
  • 📊RFM Analysis

Scanner APP

4
  • ⚡Login in the Scanner App
  • ⬇️Installation
  • 👀How it Works
  • 👨‍💼Manager Seats

📸Scan and make Transactions

7
  • ✴️Scanner app – Stamp
  • 🎟️Scanner app – Multipass
  • 💰Scanner app – Cashback
  • 💳Scanner app – Certificate
  • 🎫Scanner app -Coupon
  • ❤️Scanner app – Membership
  • 💲Scanner app – Discount

Managers

3
  • 🔃Add / Edit/ Delete
  • 👨‍💼Manager Profile
  • 📊Statistics

Push Notifications

16
  • 👀How it Works?
  • 🍏iPhone (iOS)
  • 🤖Android
  • ⏳How long does it take for push messages to be received by our customers?
  • 📫Why aren’t my customers receiving push messages?
  • 💬Push Section
  • Marketing Push
  • Sending messages to all customers
  • Sending messages to a segment of customers
  • Sending message to an individual customer
  • Geo-push
  • Push automation
  • Feedback collection
  • Next visit reminder
  • Birthday congratulation
  • Triggered auto-push

Dashboard

1
  • 📈Dashboard

Feedback Collection

1
  • ⭐Feedback collection

Referral Program

1
  • 👯Referral program

Geolocations

2
  • 📍Geolocations
  • 🗺️How to Access Locations Section?

Settings

4
  • ⚙️Settings
  • 💳Plan
  • 🛠️Personal Settings
  • 🪝Webhooks
View Categories
  • Home
  • Docs
  • Push Notifications
  • Feedback collection

Feedback collection

< 1 min read

Learn how push automation works for Feedback Collection

Bonus Pink > Left-Hand Menu > Push

1. Follow the workflow mentioned above to land on the Push notifications screen.

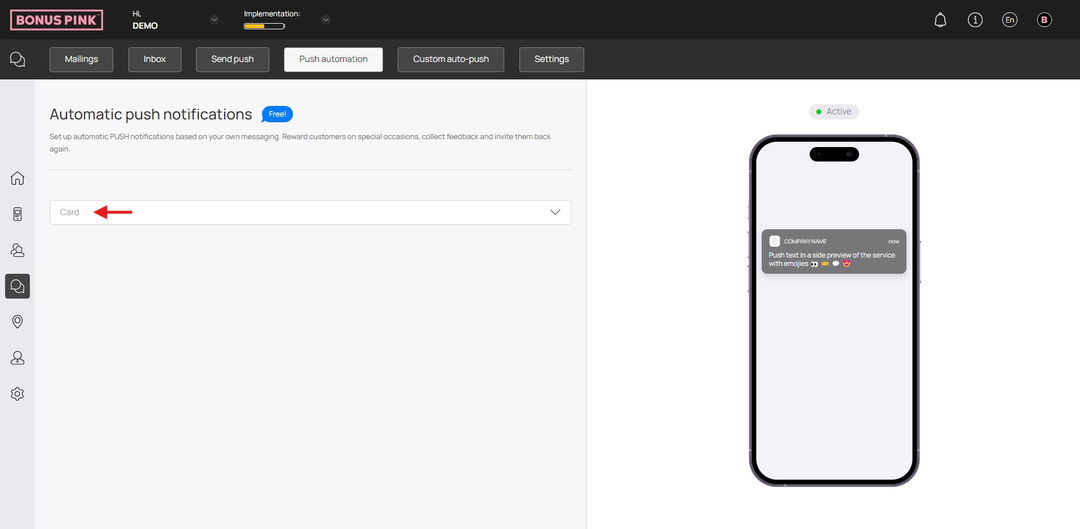
2. From the tabs listed atop the screen, click Push Automation. This takes you to the Push Automation screen.

3. Here, use the Card dropdown to select the card for which you want to setup push automation.

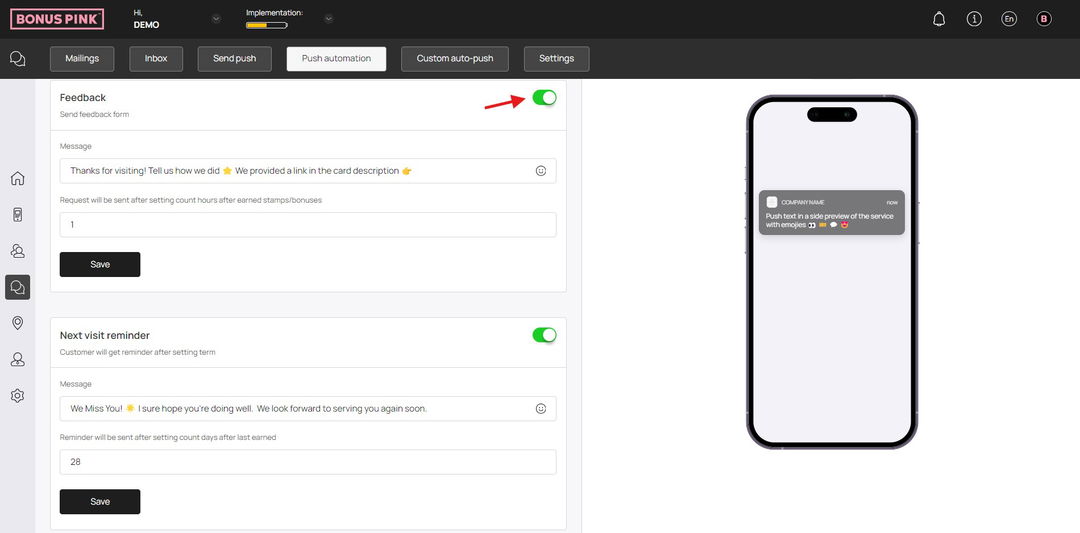
4. As a selection is made, all events for push automation are displayed via separate tiles. You can use the toggle button at the top-right corner of each tile to enable/disable the automation for that specific event.

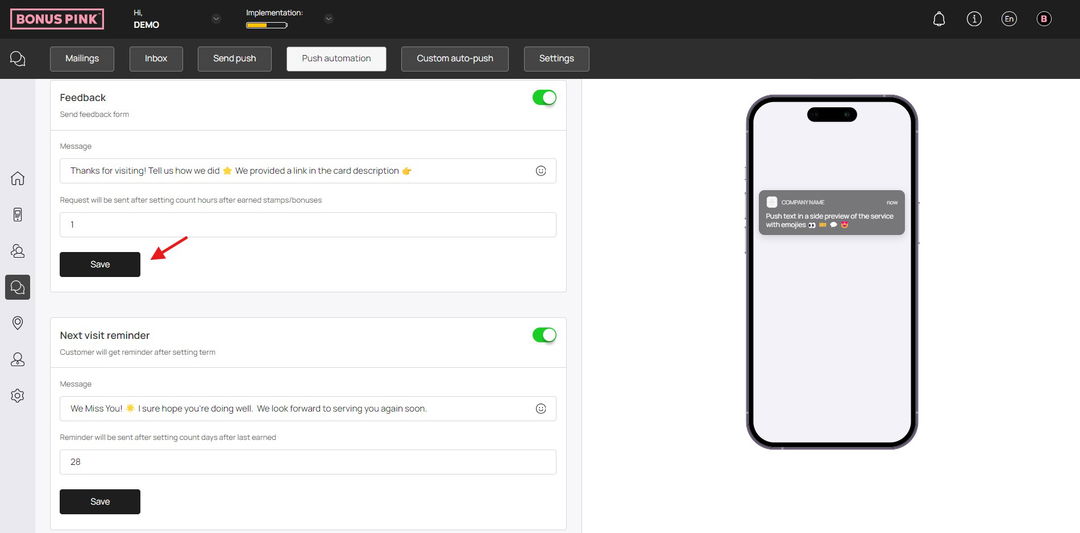
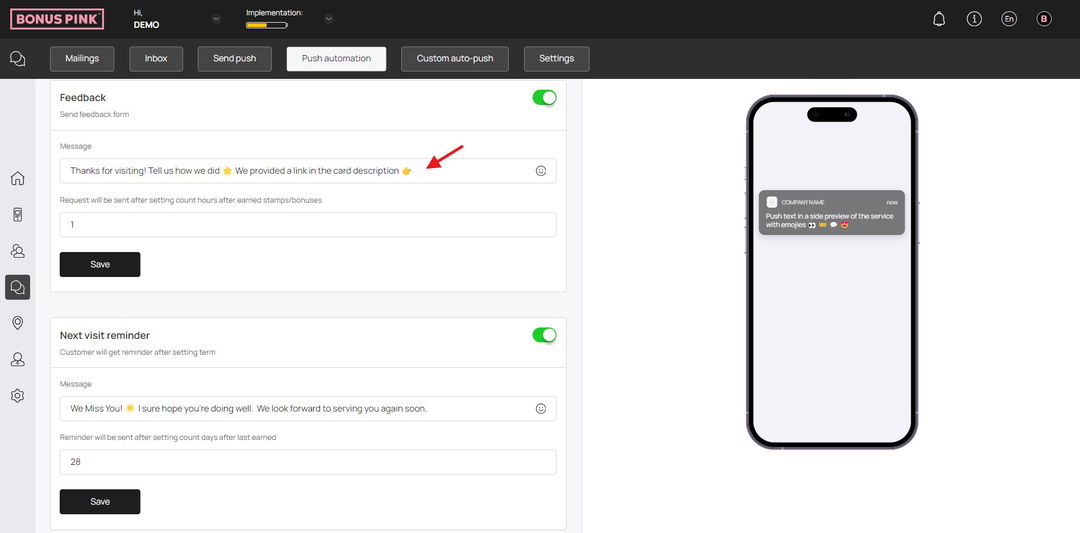
5. Record the message you want to be displayed in the push notification using the Message field.

6. Using the next field, you can set the number of hours upon visit after which the push notification for feedback is sent.

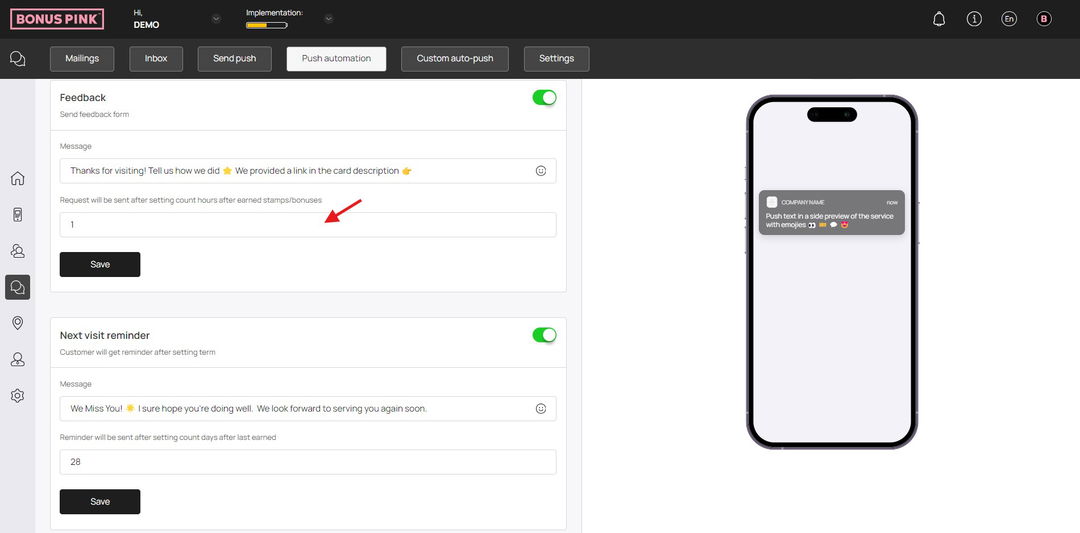
7. As the selections are made, click the Save button.

Updated on July 2, 2025

What are your Feelings

  • Happy
  • Normal
  • Sad
Share This Article :
  • Facebook
  • X
  • LinkedIn
  • Pinterest
Push automationNext visit reminder

Powered by BetterDocs

All rights reserved