Skip to content
BonusPink / Docs

Login and Regsitration

4
  • 🧑‍💻How to Register on Bonus Pink?
  • 📱How to Login with Phone?
  • 📧How to Login with Email?
  • 🔁How to Recover your Account Password?

Cards Creation

8
  • ✴️Stamp
  • 🎟️Multipass
  • 🎁 Gift
  • 💰Cashback
  • 🎫Coupon
  • ❤️Membership
  • 💲Discount
  • 🎁Reward

How to Install the Card

5
  • 🍏iPhone (iOS)
  • 🤖Android
  • PWA Cards on Android
  • Google Pay on Android
  • 🔁How to Restore the Card

Customers (CRM)

4
  • 👨Customer Profile
  • 🔃Import / Export
  • 🗃️Customer Filters
  • 📊RFM Analysis

Scanner APP

4
  • ⚡Login in the Scanner App
  • ⬇️Installation
  • 👀How it Works
  • 👨‍💼Manager Seats

📸Scan and make Transactions

7
  • ✴️Scanner app – Stamp
  • 🎟️Scanner app – Multipass
  • 💰Scanner app – Cashback
  • 💳Scanner app – Certificate
  • 🎫Scanner app -Coupon
  • ❤️Scanner app – Membership
  • 💲Scanner app – Discount

Managers

3
  • 🔃Add / Edit/ Delete
  • 👨‍💼Manager Profile
  • 📊Statistics

Push Notifications

16
  • 👀How it Works?
  • 🍏iPhone (iOS)
  • 🤖Android
  • ⏳How long does it take for push messages to be received by our customers?
  • 📫Why aren’t my customers receiving push messages?
  • 💬Push Section
  • Marketing Push
  • Sending messages to all customers
  • Sending messages to a segment of customers
  • Sending message to an individual customer
  • Geo-push
  • Push automation
  • Feedback collection
  • Next visit reminder
  • Birthday congratulation
  • Triggered auto-push

Dashboard

1
  • 📈Dashboard

Feedback Collection

1
  • ⭐Feedback collection

Referral Program

1
  • 👯Referral program

Geolocations

2
  • 📍Geolocations
  • 🗺️How to Access Locations Section?

Settings

4
  • ⚙️Settings
  • 💳Plan
  • 🛠️Personal Settings
  • 🪝Webhooks
View Categories
  • Home
  • Docs
  • Settings
  • 💳Plan

💳Plan

1 min read

Learn how to access the Plan section and view subscription plans

Bonus Pink > Left-Hand Menu > Settings

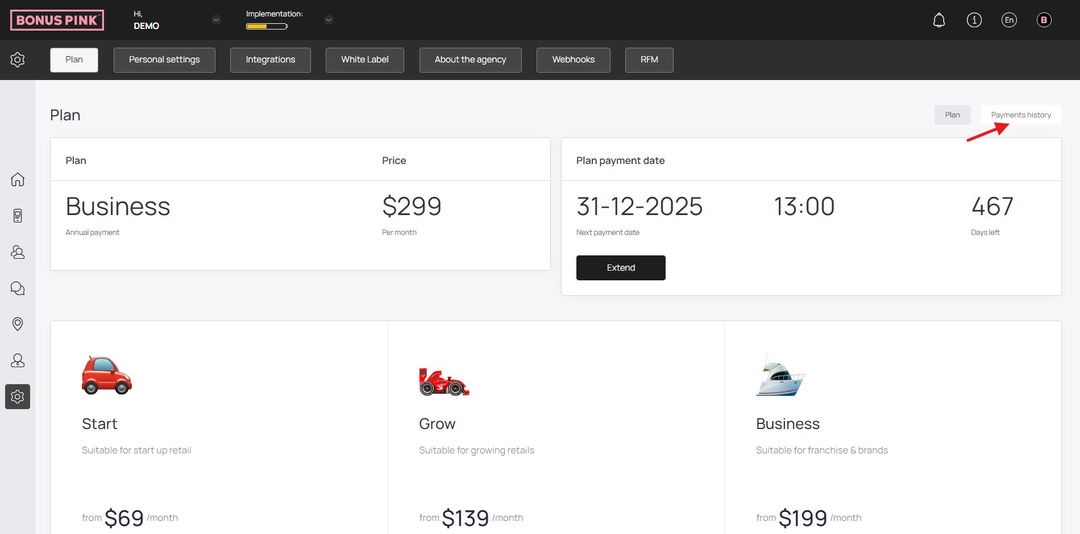
1. Follow the workflow mentioned above to land on the Plan tab.

2. Here, the plan details are displayed via two sections that include Plan and Payment History.

3. In the Plan section, the current plan you have subscribed to is displayed alongside its price in a tile.

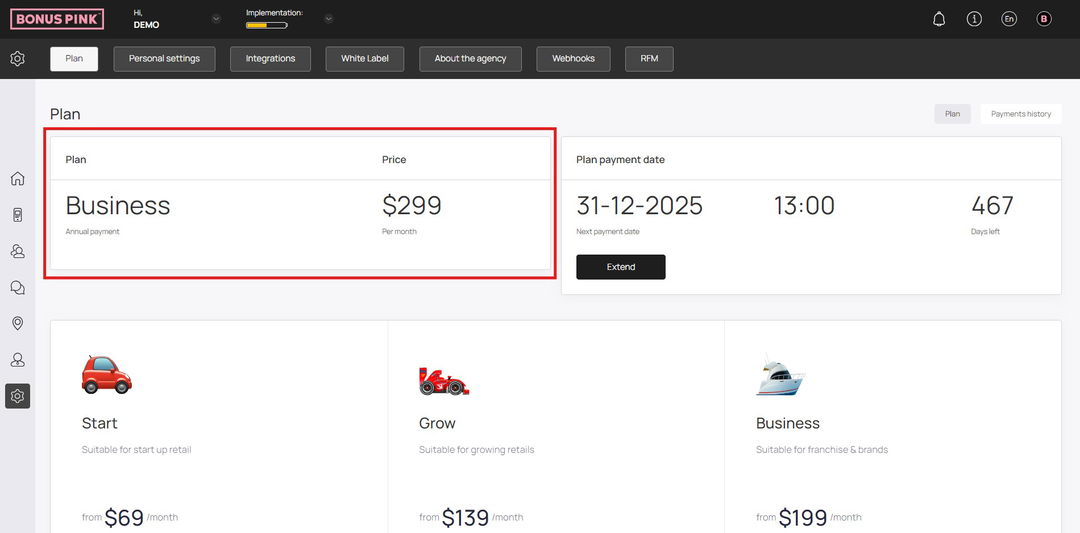
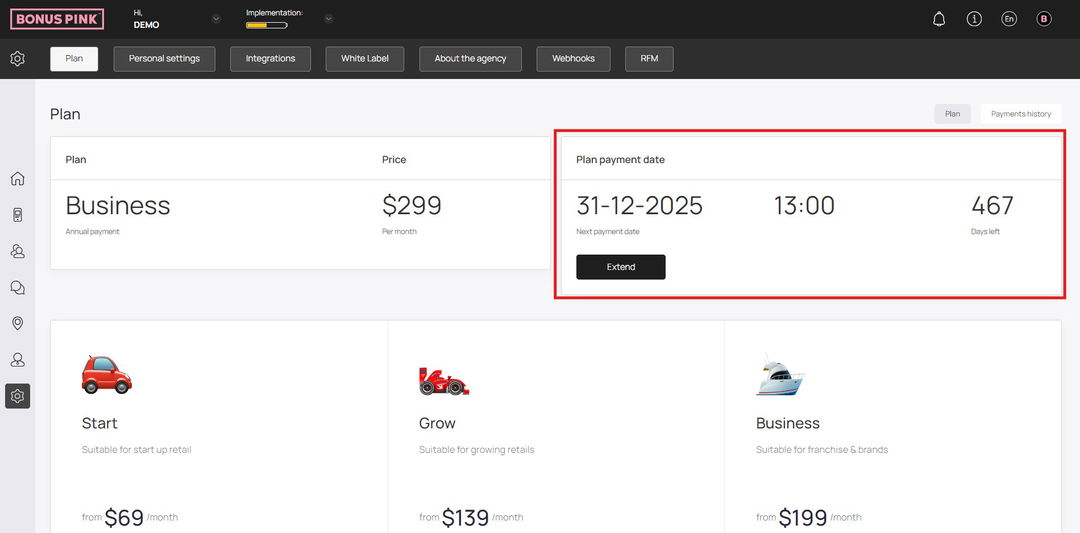
4. Next up is the Plan Payment Date tile. Here, details of the next payment date are displayed that include Next Payment Date, PST, and Days Left.

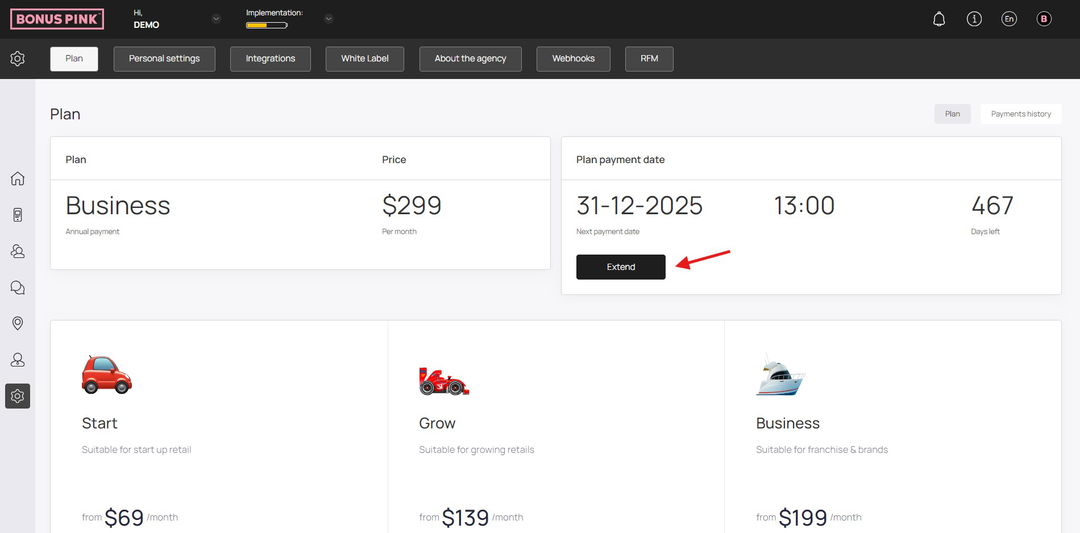
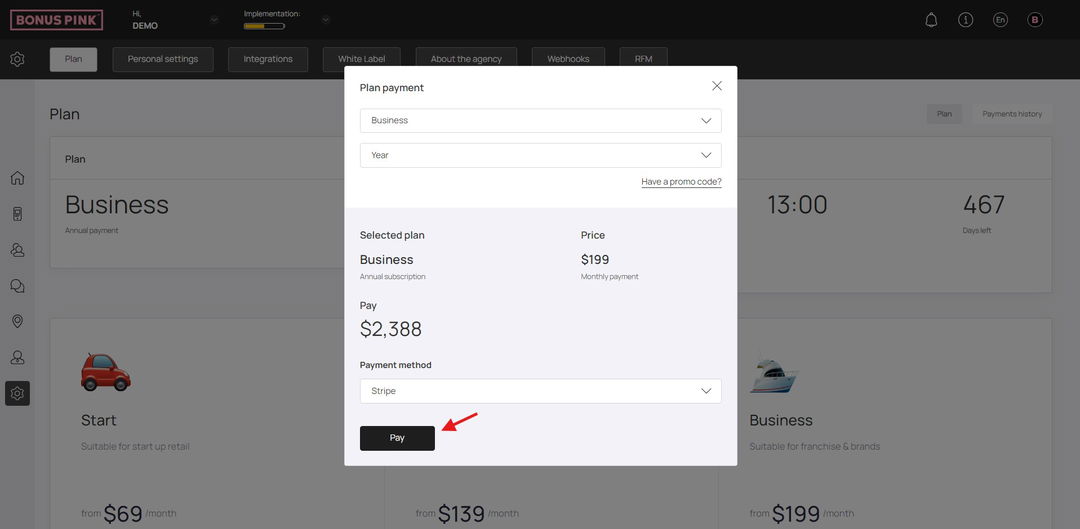
5. To extend the payment date, click the Extend button. Doing so opens the Plan Payment popup.

6. Here, choose the plan type from the Type dropdown.

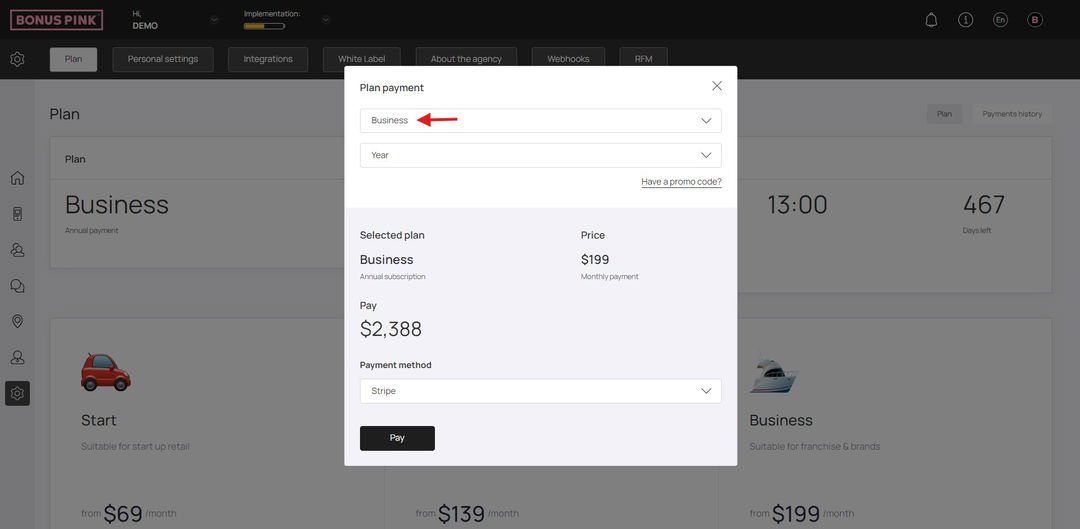
7. Similarly, choose the payment frequency from the next dropdown.

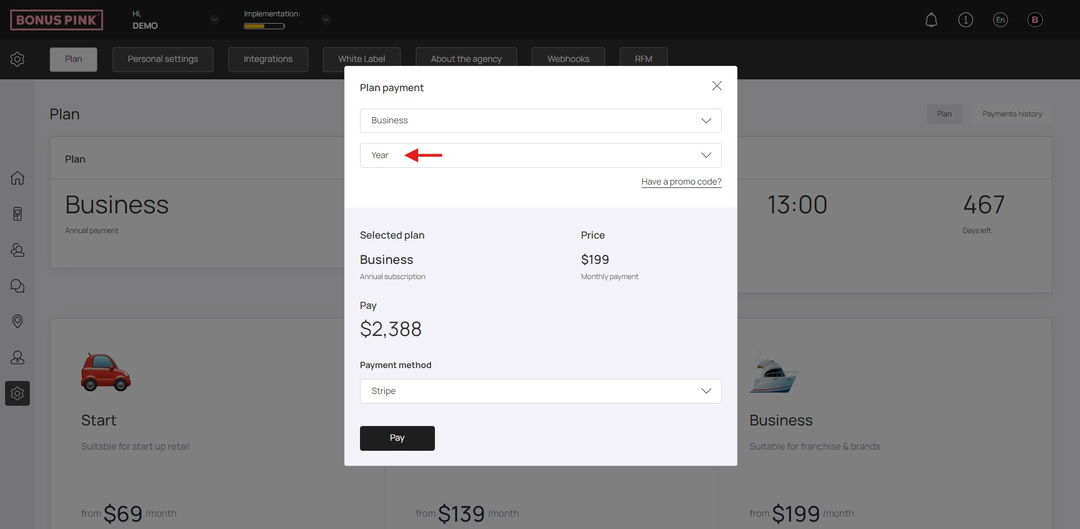
8. Once the required selections are made, click the Pay button.

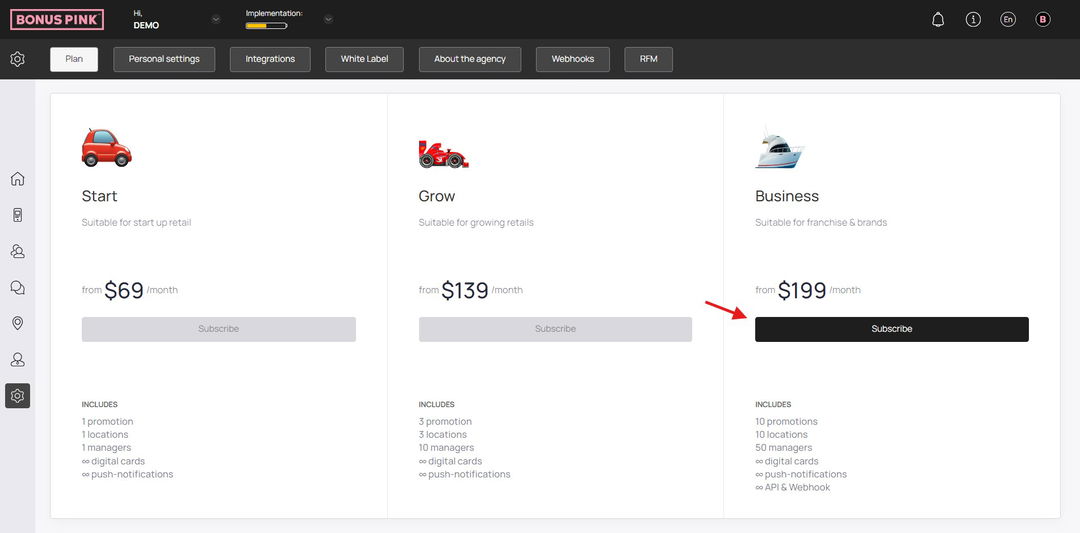
9. Scrolling down further, you can see all the available subscription plans offered by Bonus Pink. The Buy button for your current plan is greyed out. Each plan is displayed with its price and the features it includes. To switch to a different plan, click the Buy button below it.

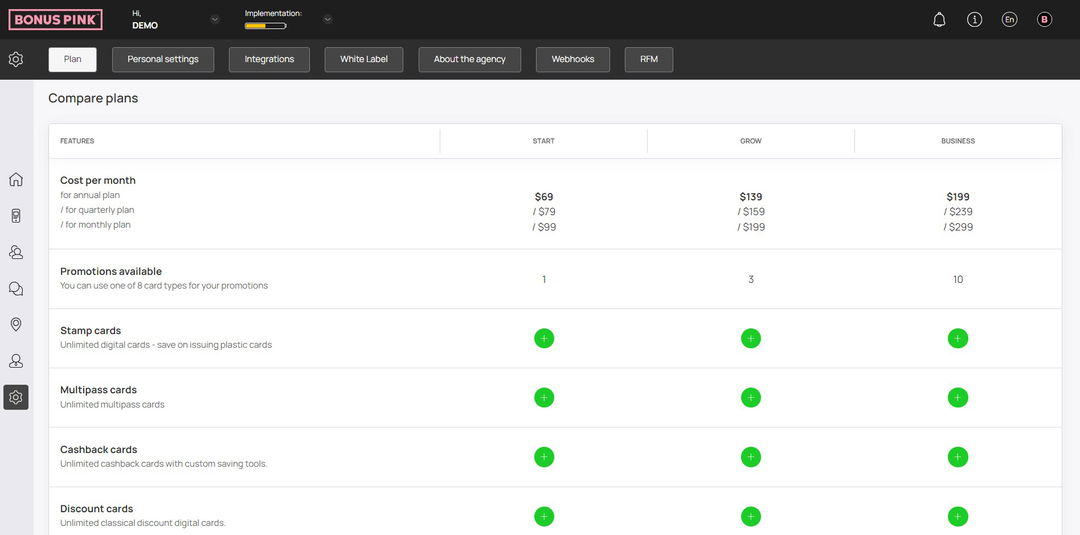
10. Towards the end of the screen is the Compare Plans section. Here, all the available subscription plans are listed with the features each one includes. An available feature is represented by a + icon in green whereas an unavailable feature is denoted by a – button in red.

Payments History

1. To access payments history, click the Payments History button located at the top-right corner.

2. Here, all historical payments made are listed. Information for each payment is tabulated via various columns that include Status, Transaction ID, Date, Amount, and Details.

Updated on July 1, 2025

What are your Feelings

  • Happy
  • Normal
  • Sad
Share This Article :
  • Facebook
  • X
  • LinkedIn
  • Pinterest
⚙️Settings🛠️Personal Settings

Powered by BetterDocs

All rights reserved